Running Cilium on an Azure AKS Cluster
There is some great documentation on Cilium on the Isovalent site and on Github. This article draws on that documentation and whittles it down to focus on using a Windows client to install Cilium on an Azure AKS cluster.
The first thing to do is head over to the releases page of the Cilium Gihub repo. We are using a Windows client so we selected the cilium-windows-amd64.tar.gz archive. Next you just need to extract the tar archive, copy the exe to your preferred location on disk and then add the location to your path. That's all there is to it!
Next we will just verify that everything is working correctly:

Next we need to create our AKS cluster. The critical thing here is that we do not install any network plug-in at this point. This is taken care of by the --network-plugin none parameter. It is normally my preference to attach the cluster to a container registry and specify a custom vm size but these parameters are optional.
az aks create --resource-group {your-resource-group} --name {your-cluster-name} --node-count 2 --generate-ssh-keys --attach-acr {your-container-registry} --network-plugin none --node-vm-size Standard_B2s
Once the cluster has been provisioned, we just need to get credentials:
az aks get-credentials --resource-group {your-resource-group} --name {your-cluster-name} --overwrite-existing
The next step may seem slightly odd, but the guidance suggests cloning the Cilium GitHub repo. This means that the Cilium Cli can point to a fresh version of the Helm values chart when you run the install onto your cluster. Clone the Cilium repo:
git clone https://github.com/cilium/cilium.git
Next, we will install Cilium onto our cluster. There are two methods for this.
Method 1 - Cilium CLI
This will install Cilium into your cluster using Helm in the background - you do not have to explicitly invoke any Helm commands yourself.
cilium install --chart-directory cilium-main/install/kubernetes/cilium --set azure.resourceGroup="{your-resource-group}"
You should see an output something like this - with some nice colourful icons:

Method 2 - Helm
Instead of using the Cilium CLI, you can use the standard Helm install procedure:
helm repo add cilium https://helm.cilium.io/
helm upgrade --install cilium cilium/cilium
Obviously, if you are using this method (and you are familiar with Cilium configuration), you can also pass in Helm overrides:
helm repo add cilium https://helm.cilium.io/
helm upgrade --install cilium cilium/cilium --version 1.13.0-rc3 \
    --namespace kube-system \
    --set sctp.enabled=true \
    --set hubble.enabled=true \
    --set hubble.metrics.enabled="{dns,drop,tcp,flow,icmp,http}" \
    --set hubble.relay.enabled=true \
    --set hubble.ui.enabled=true \
    --set hubble.ui.service.type=NodePort \
    --set hubble.relay.service.type=NodePort
For a fuller discussion of options on installing Cilium in to your cluster see this article by Nico Vibert.
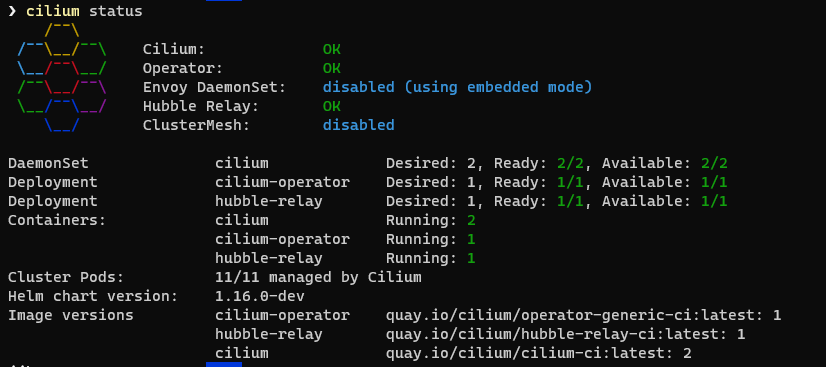
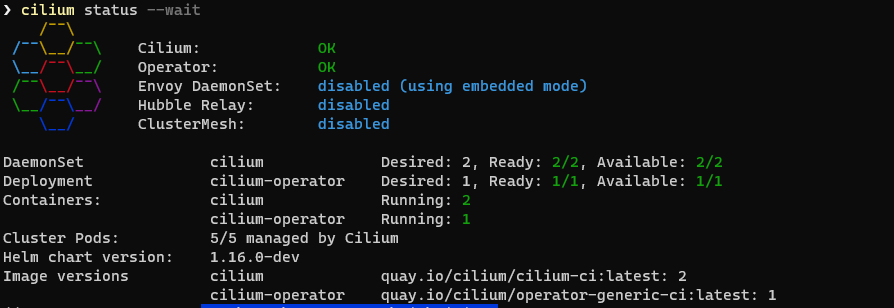
To validate the installation run :
cilium status --wait
In Windows Terminal you can expect a response something like this:
Next we need to verify that network connectivity in our cluster is functioning properly:
cilium connectivity test
These tests may take quite a while and you will see quite a long series of notifications in your terminal window:

As you can see, some tests will be skipped if they are not relevant for your current cluster configuration:

Luckily, we seem to have a clean bill of health:

That's it! Cilium is now successfully installed on our cluster!
Exploring with the Cilium API
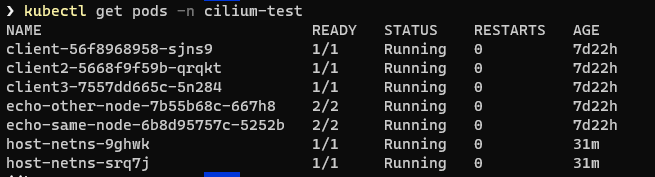
Now that Cilium is running on our cluster, we can take a look at the resources it has installed. The first thing is to view the pods it has created.
By default they are installed in the
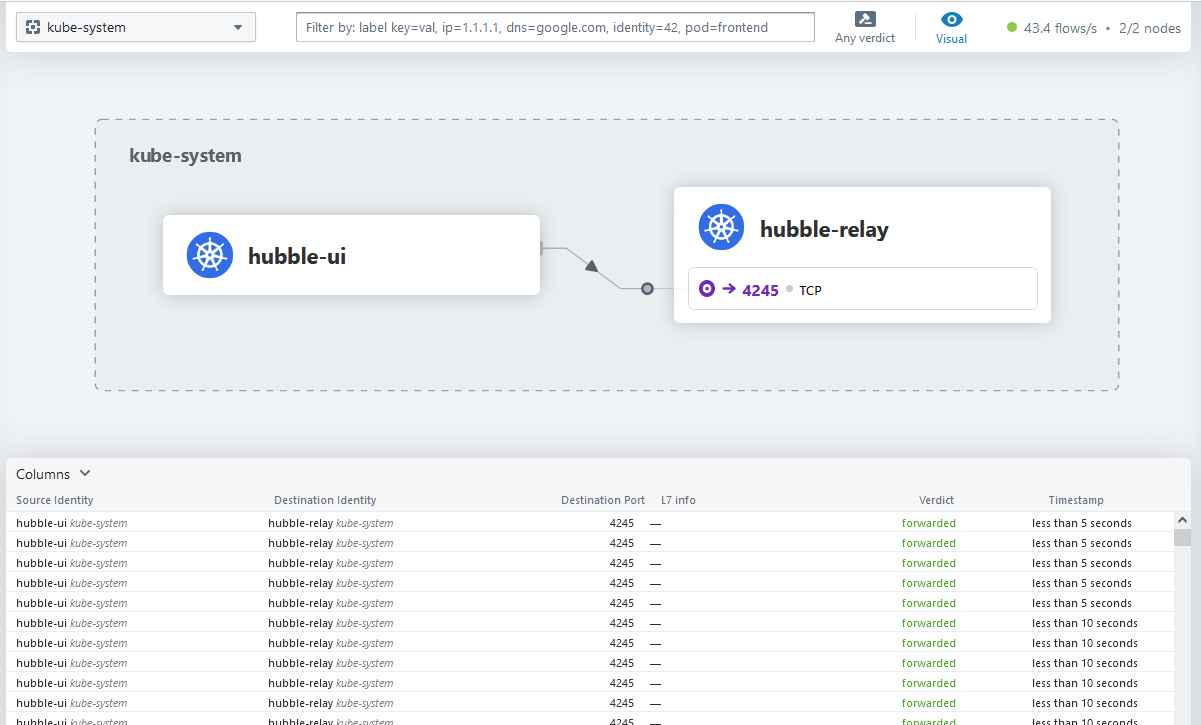
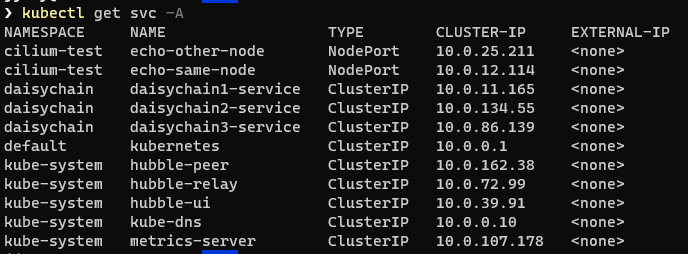
As well as the pods, the install also creates a number of services. As you can see, the Hubble-related services are installed into the kube-system namespace.
OK - let's dive into a Cilium container and have a look around. First we will run the kubectl exec command to get a shell to the container:
kubectl exec -ti cilium-c7c78 -n kube-system -- bash
You should see a prompt something like this

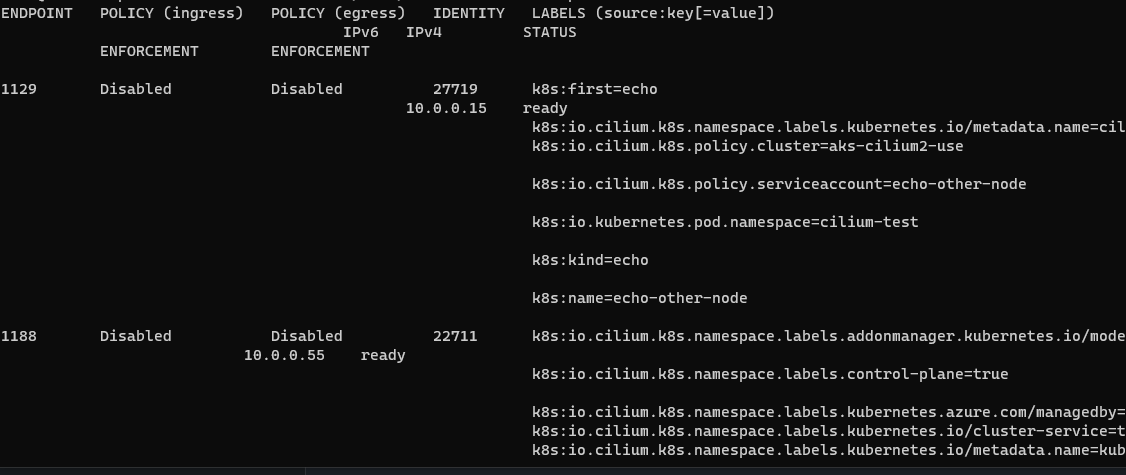
Endpoints are a fundamental concept in Cilium. The most simple command we can run on them is simply to get a list:
cilium endpoint list
This gives us a high level view of the Endpoints that reside on a particular node. Endpoints can include pods in a Kubernetes environment, VMs, or bare-metal interfaces that Cilium manages for applying network policies, routing, and visibility.
If we want to drill down into the internals of our Endpoints we can use the bpf command
cilium bpf endpoint list
You should now see an output like this.

This returns a hash table of the endpoints running on the local machine.
It lists the BPF maps and other BPF-related state information that Cilium maintains for each endpoint.
Having looked at our endpoint, the next thing we might want to do is inspect the state of our environment. The cilium connectivity test command is a very powerful tool that possibly does more than the name actually suggests. This will run tests across a number of dimensions.
- pod to pod within a node
- pod to pod across nodes
- pod to nodeport
- etc
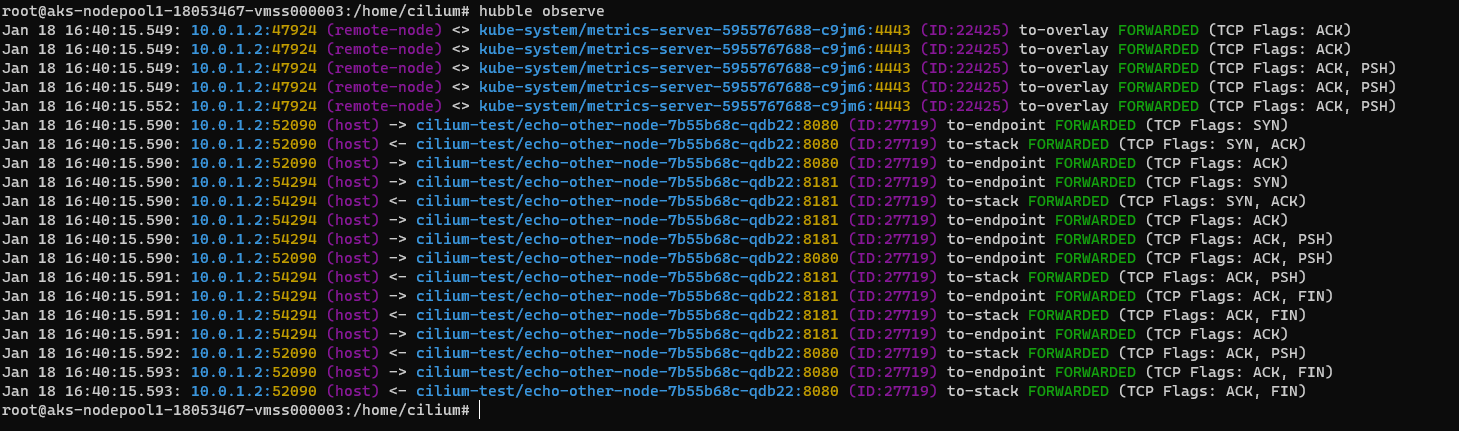
Note! We are running the command below from our terminal - not from our container session:
cilium connectivity test
In the screnshot below we can see detailed information about our endpoint connectivity as well as the status of our network policies: